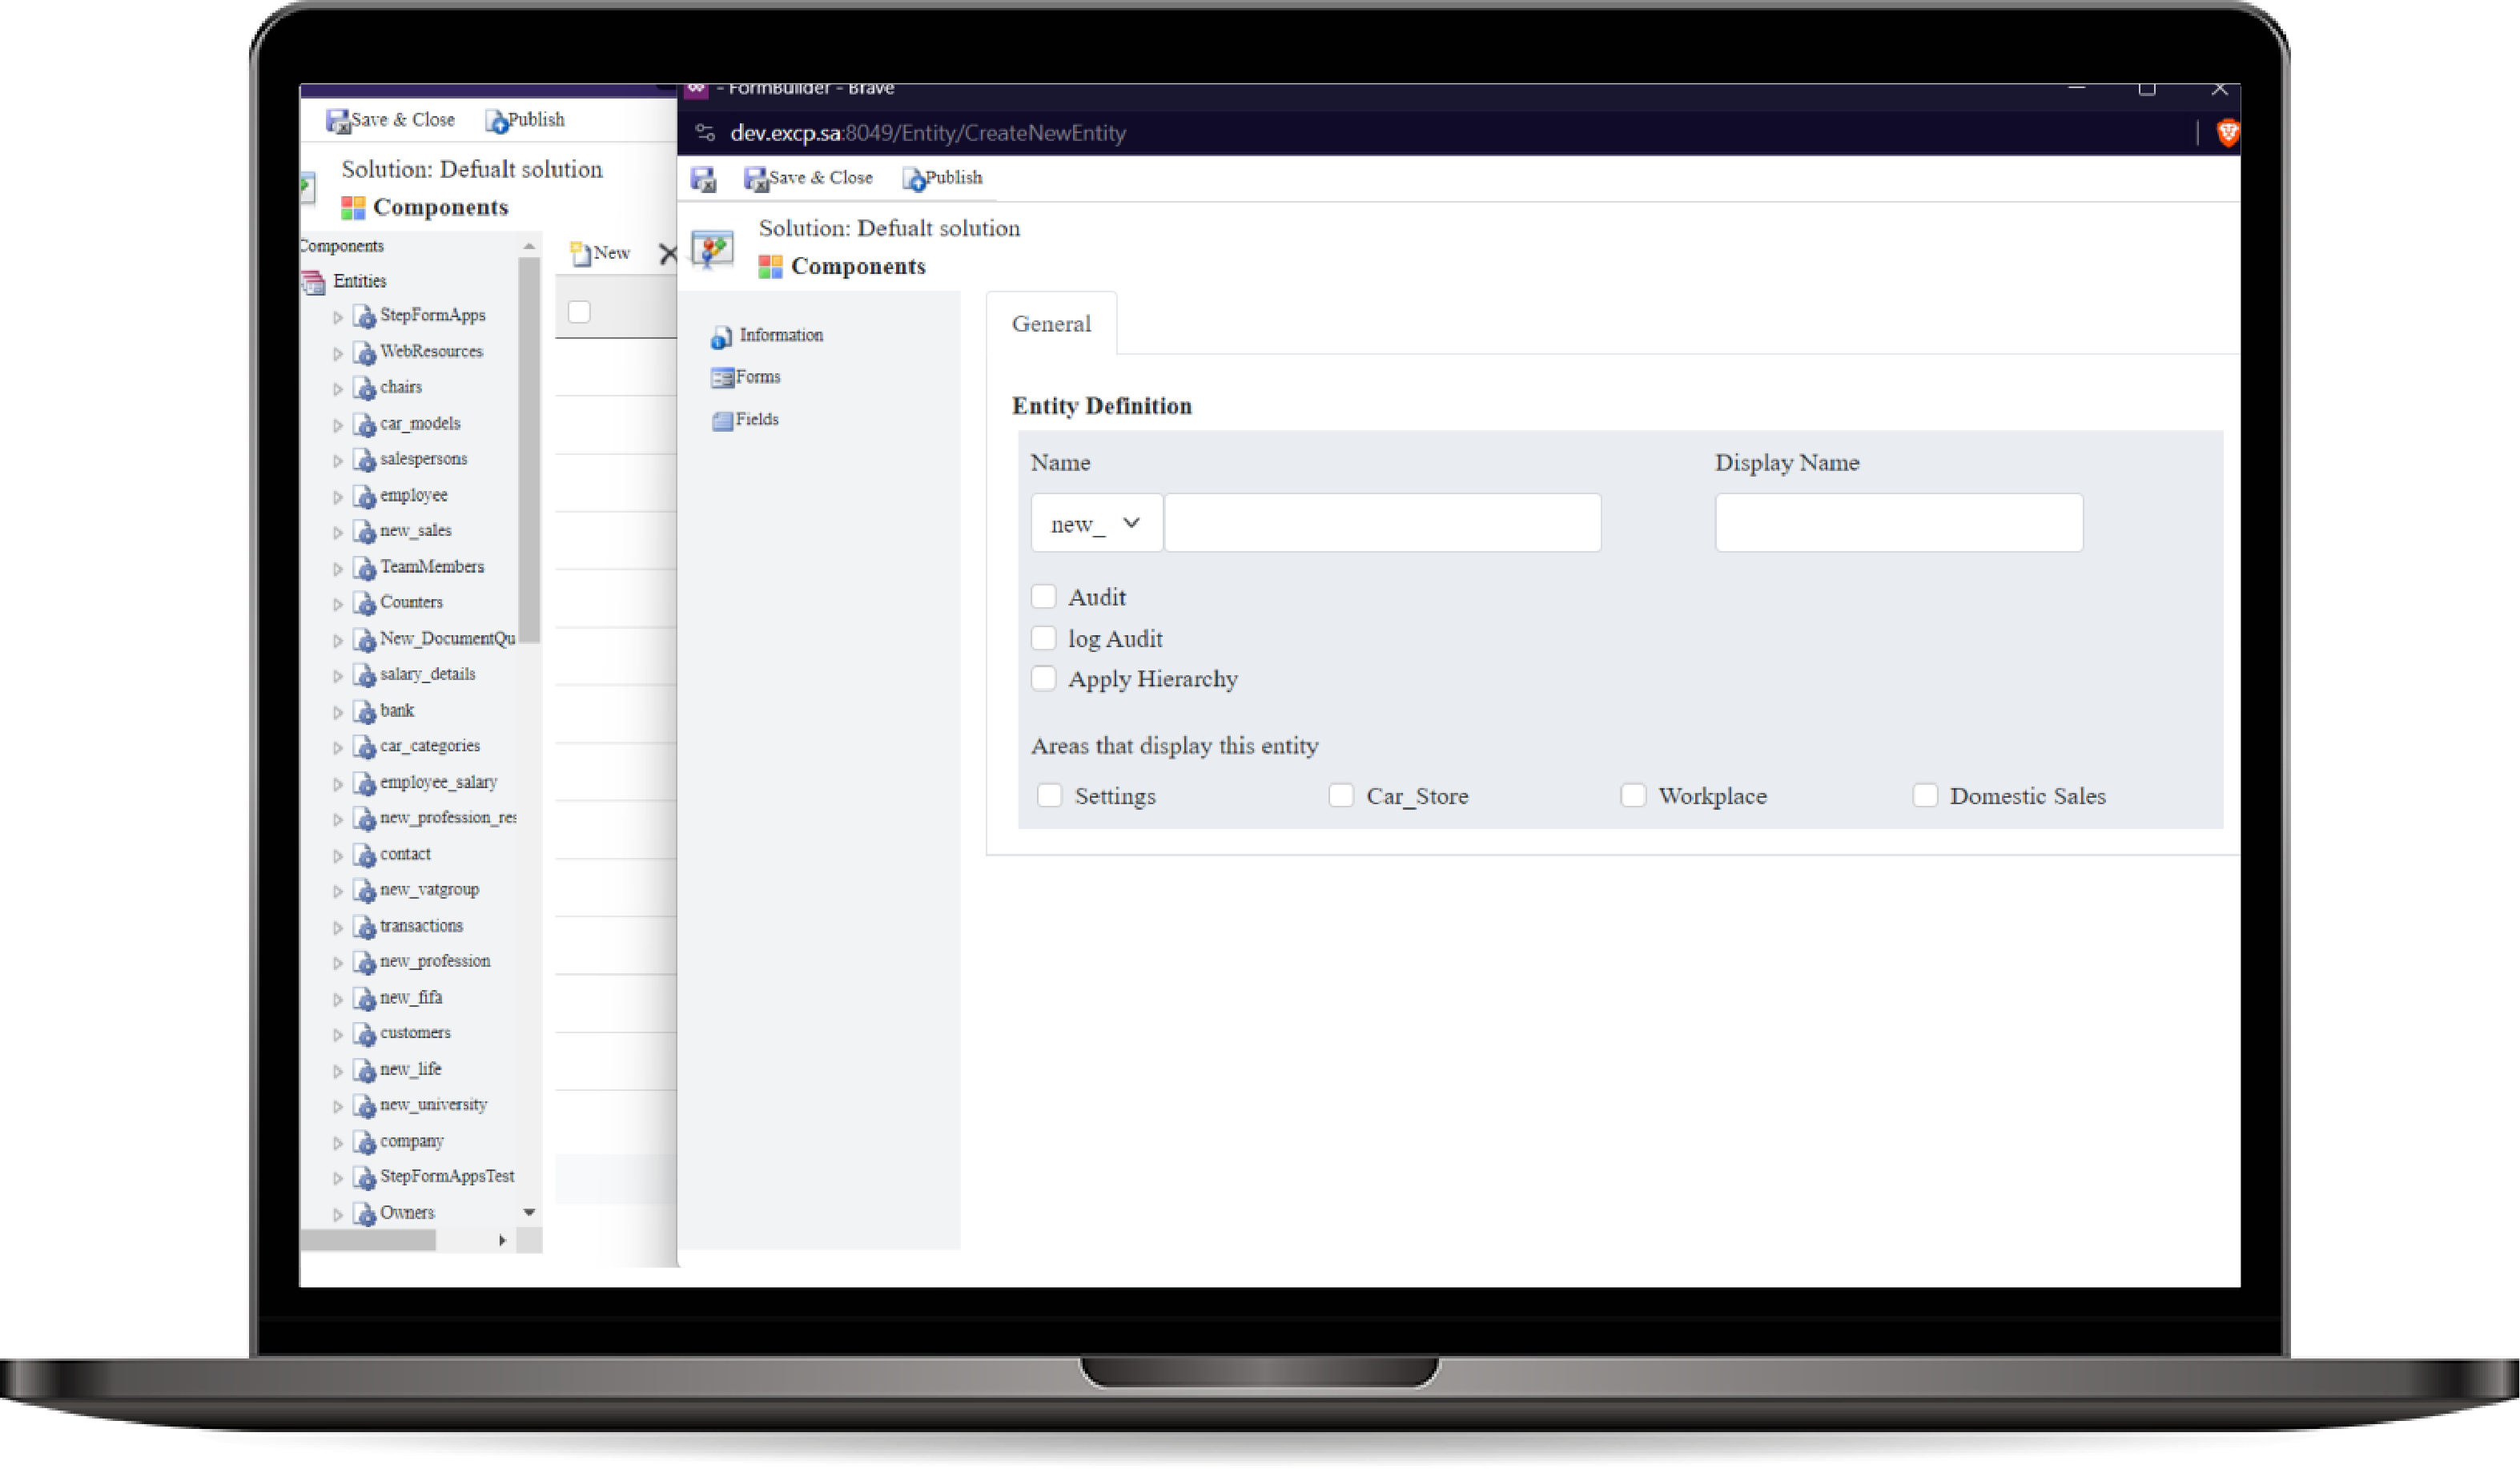
Entity Editor
The Entity Editor allows users to define entities entirely through the UI, eliminating the need for manual backend modifications. Once an entity is created via the UI, the system automatically generates the necessary services and handles CRUD operations through a generic backend service.
How to use the Entity Editor?
- Creating a New Entity:
- Navigate to the Entity Editor in the UI
- Click Create New Entity.
- Enter the Entity Name (e.g., "Customer", "Invoice").
- Audit Settings: Select whether this entity should be auditable. This will enable tracking of changes made to the entity’s data.
- Hierarchy: Choose whether the entity should support hierarchical structures. This is useful for entities like organizational units or departments.
- Area: Specify the Area where this entity should be categorized (e.g., Sales, Marketing, Finance).
- Click Save to create the entity.
- Auditable Option:
- When Audit is enabled, the system automatically tracks changes to the entity's records, allowing for review and accountability.
- Audit logs can be accessed through the Audit Log Tool, which shows modifications made to the entity over time.
- Hierarchy Option:
- Enabling Hierarchy allows the entity to participate in parent-child relationships, common in organizational structures.
- For example, you can have hierarchical relationships between Accounts and Sub-Accounts or Departments and Sub-Departments.
- Specifying Area
- The Area selection determines where the entity will appear within the UI. This helps categorize entities based on business functions (e.g., Sales, Support, HR).
- This ensures that the entities are organized and accessible according to the user’s role or department.
- Saving the Entity
- Once you’ve specified the Name, Audit Settings, Hierarchy, and Area, click Save.
- The system will automatically create the entity and register it in the backend using the generic service.