Excel Grid
The Excel Grid feature provides users with an intuitive and powerful interface for viewing, editing, and managing data in a tabular format. It allows for seamless integration with Excel functionalities, enabling users to leverage familiar spreadsheet capabilities while interacting with the application’s data. This feature is particularly useful for handling large datasets, facilitating bulk updates, and performing data analysis.
How to use Excel?
- Access the Target Entity:
- Navigate to the home page of the entity where the Grid view is displayed.
- You will find three buttons: `Download Excel Template`, `Export To Excel`, and `Import Excel`.
-
Export Excel Sheet:
-
Download Excel Template:
- Click on the Download Excel Template button to download a blank Excel sheet. This sheet will have the column structure of the current grid but no data, allowing you to fill in new data manually.
- Export To Excel:
-
Download Excel Template:
-
Process the Excel File:
-
Open the exported Excel sheet and make your necessary changes:
- For Empty Sheet: Add new records following the provided column structure.
- For Sheet with Data: Update the existing records or add new ones in the same structure.
-
Open the exported Excel sheet and make your necessary changes:
-
Import Data:
- After making changes, save the Excel file.
- Go back to the Grid view and click the Import button.
- Upload your modified Excel file.
-
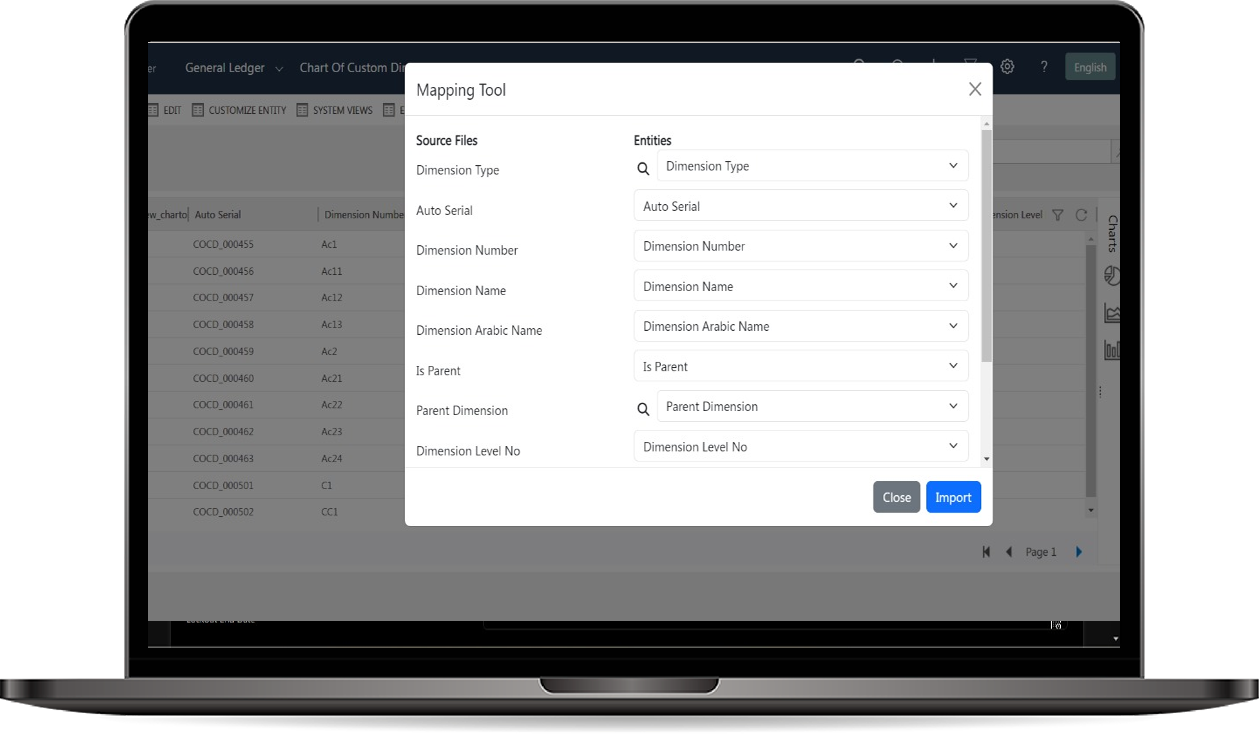
Field Mapping:
- Once the file is uploaded, a modal will open where you can match the columns from the Excel sheet to the fields in the entity.
- The system will automatically suggest matches, but you can adjust the mappings manually if needed.
- Confirm the mappings once you’ve reviewed them.
-
Complete the Import:
- After field mapping is complete, the system will process the file and import the data into the entity.
- The records will be added or updated based on your changes.