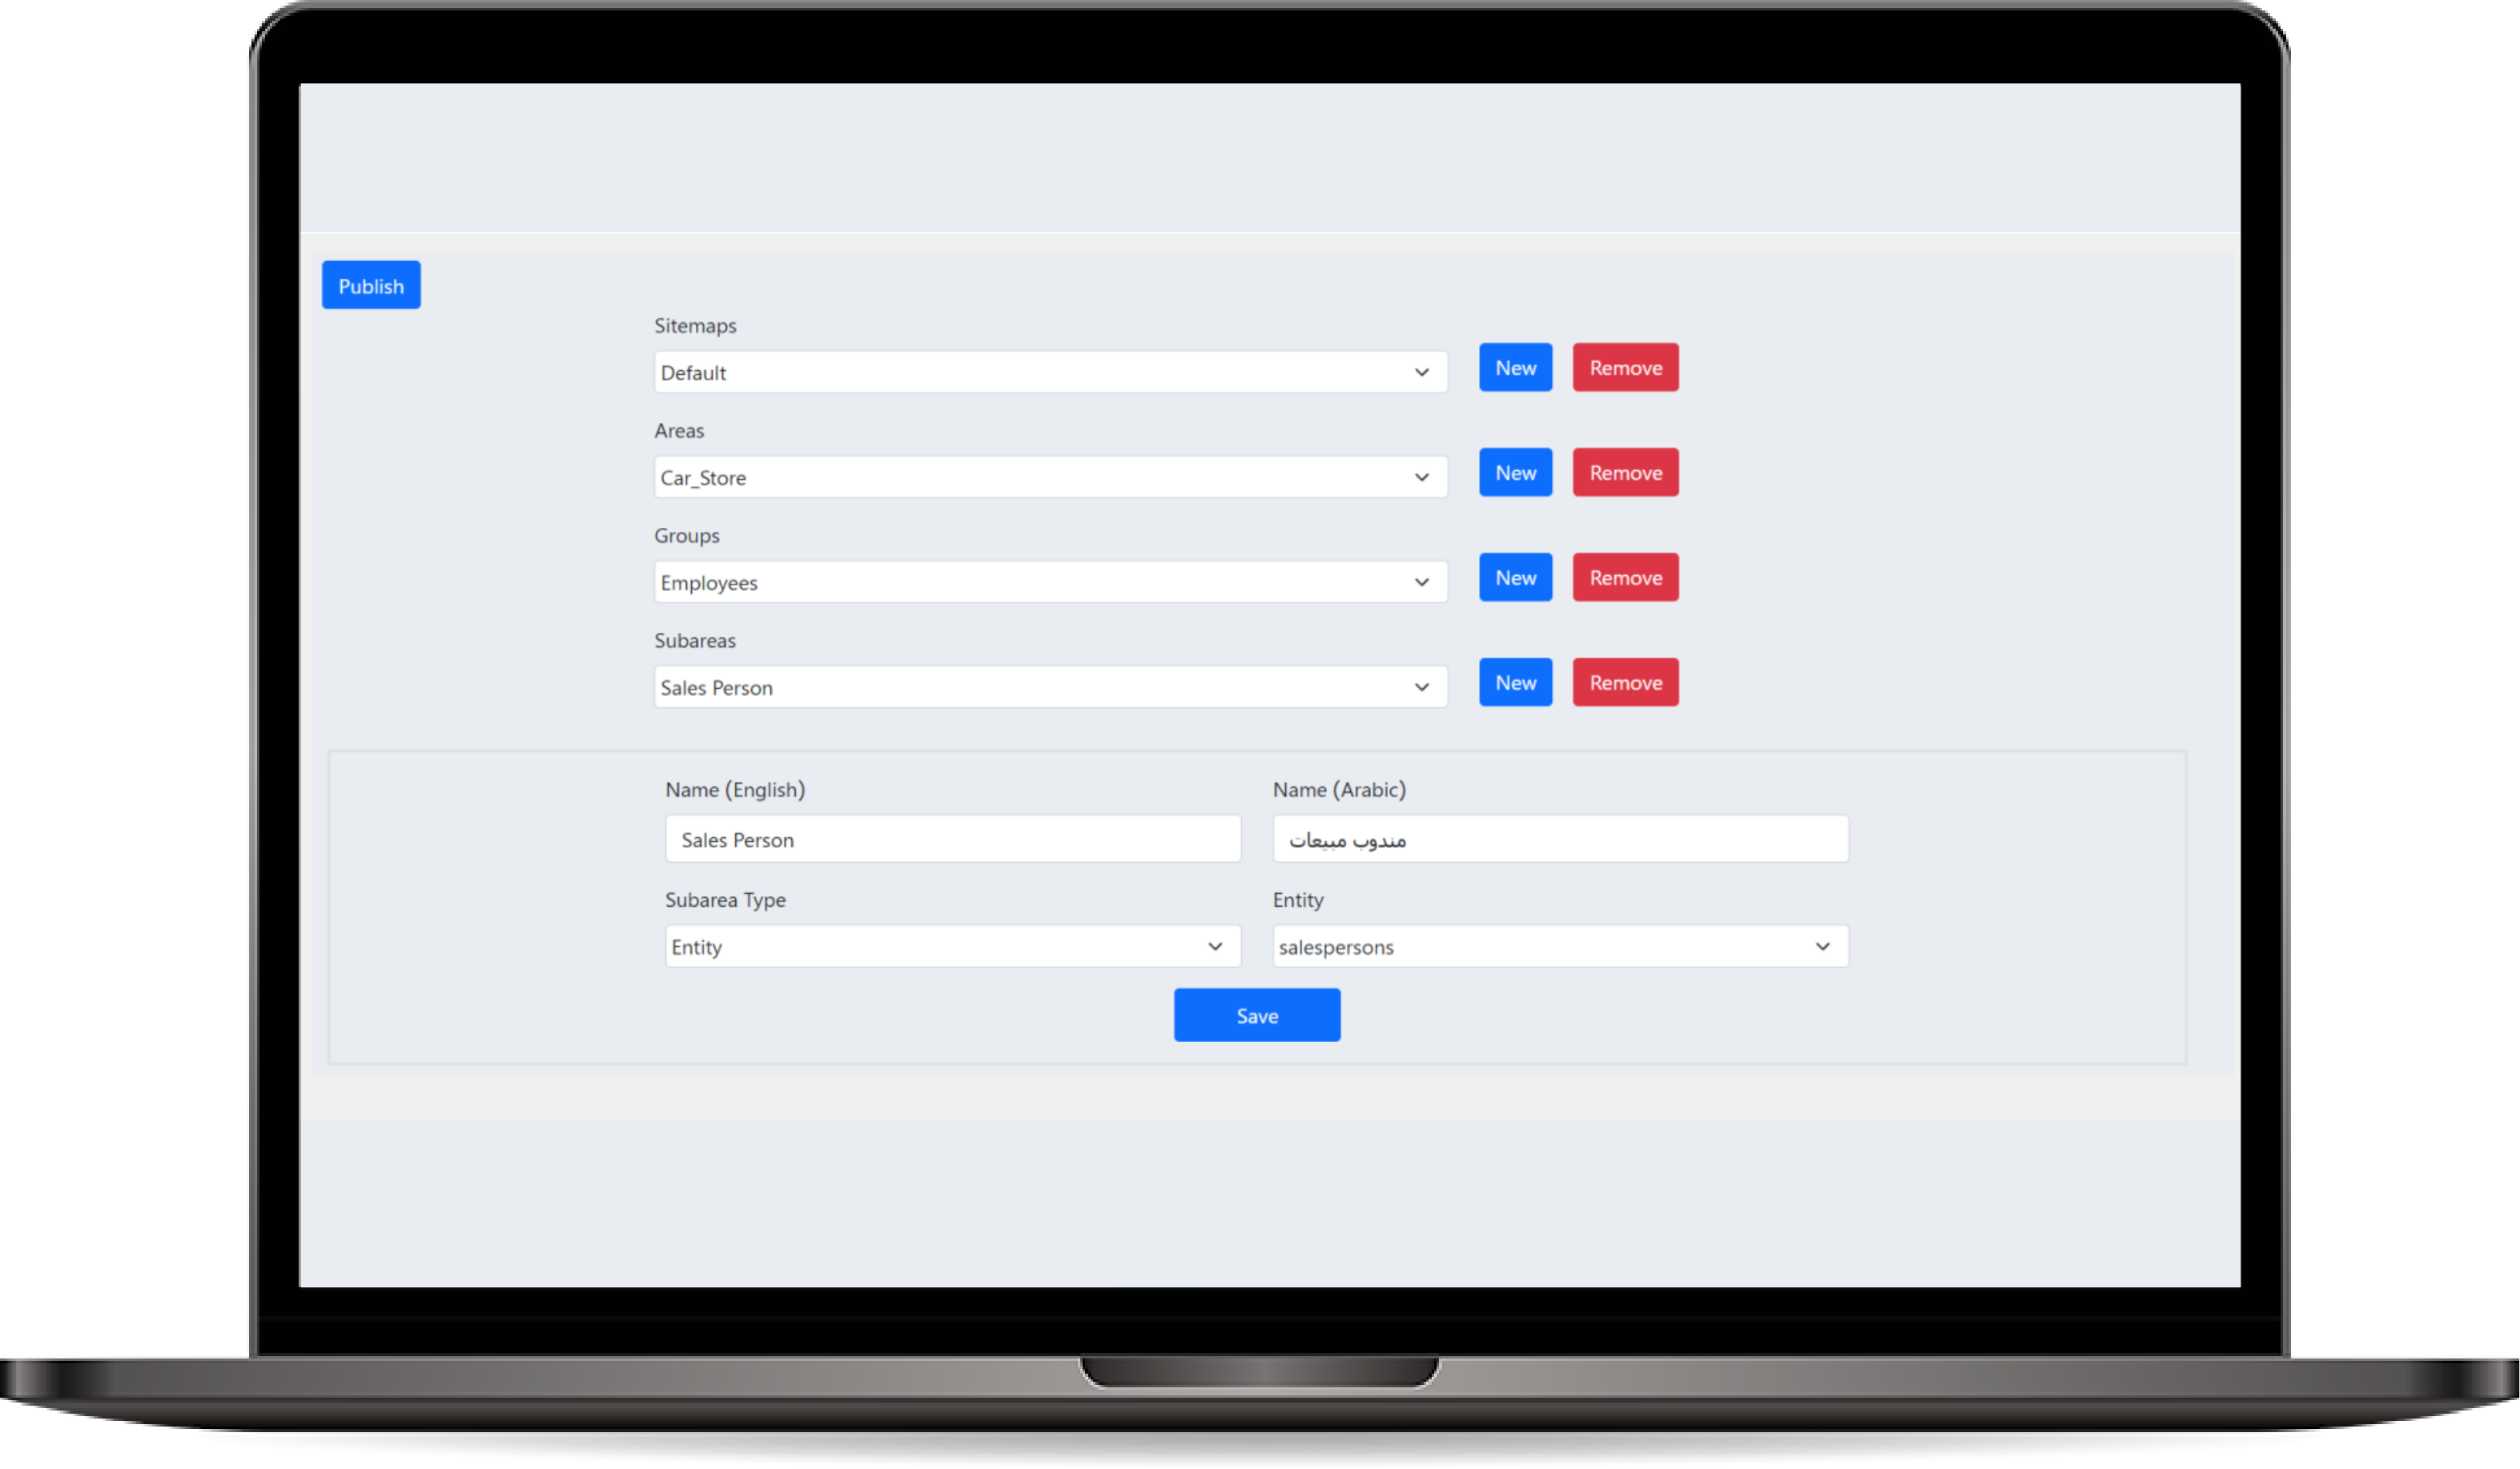
SiteMap Editor
The SiteMap Editor allows developers and administrators to configure the application's navigation structure, similar to how it's done in CRM systems. Users can add, edit, and organize areas, subareas, and groups to create a custom navigation experience for different roles or departments within the application. This tool gives flexibility in managing how users access different parts of the system.
How to use SiteMap Editor?
- Accessing the SiteMap Editor:
- Navigate to the SiteMap Editor from menu.
- Adding a New Area:
- Click Add Area to create a new section in the main navigation (e.g.,Sales, Marketing, Settings ).
- Name: Enter the name of the area.
- Icon: Optionally, upload an icon to represent this area in the navigation menu.
- Display Name Translation: You can enter the English and Arabic names directly in the form (use the translation input fields here for both languages).
- Adding a Group:
- Within each Area, you can organize navigation items into Groups.
- Click Add Group under an area to create a new group (e.g., Accounts, Opportunities under Sales ).
- Name: Enter the name of the group.
- Translation: As with areas, you can add translations directly for English and Arabic during the group creation.
- Adding Subareas:
- Each Group can contain multiple Subareas (e.g., specific entities, dashboards, forms).
- Click Add Subarea to create a new subarea under the selected group.
-
Entity or URL: Choose whether the subarea links to an entity or a custom URL (e.g., an external link or custom page).
- If linking to an entity, select the entity name (e.g.,Accounts, Invoices ).
- If linking to a URL, provide the full URL path.
- Icon: Optionally, add an icon to represent this subarea in the navigation.
- Translations: Enter the English and Arabic names for the subarea in the provided input fields.
- Saving and Publishing the SiteMap:
- After configuring the site map, click Save to store your settings.
- To make the site map changes live, click Publish . This action will apply the new structure and make it available to users.